Sending event service mails
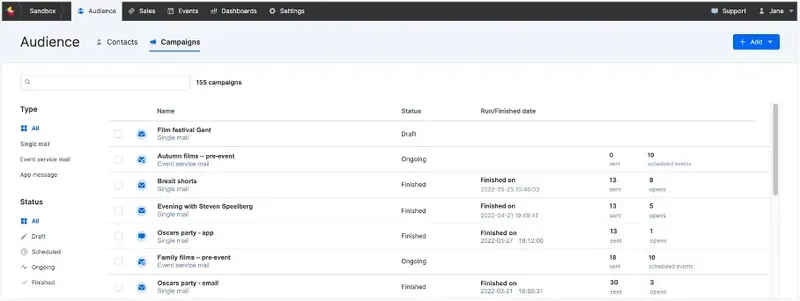
Email campaigns are managed in the Audience module
Before you start sending an email campaign, you need to ensure that the required marketing email senders are correctly set up. This includes validating ownership of the email address(es) and setting up SPF and DKIM records (which are types of security). These steps are essential to maximize the chances of your emails reaching their intended audience. Please contact support if you need help setting this up.
In this article, we explain how to set up and send an event service mail.
With event service mails, you can easily schedule standardized emails to be sent a fixed number of days before or after an event. Think of practical information about, for example, transport/mobility, cloakroom facilities, and beverage options.
By adding merge tags for event and contact details, you can personalize these emails and tailor them to your audience.
Creating Event Service Mails
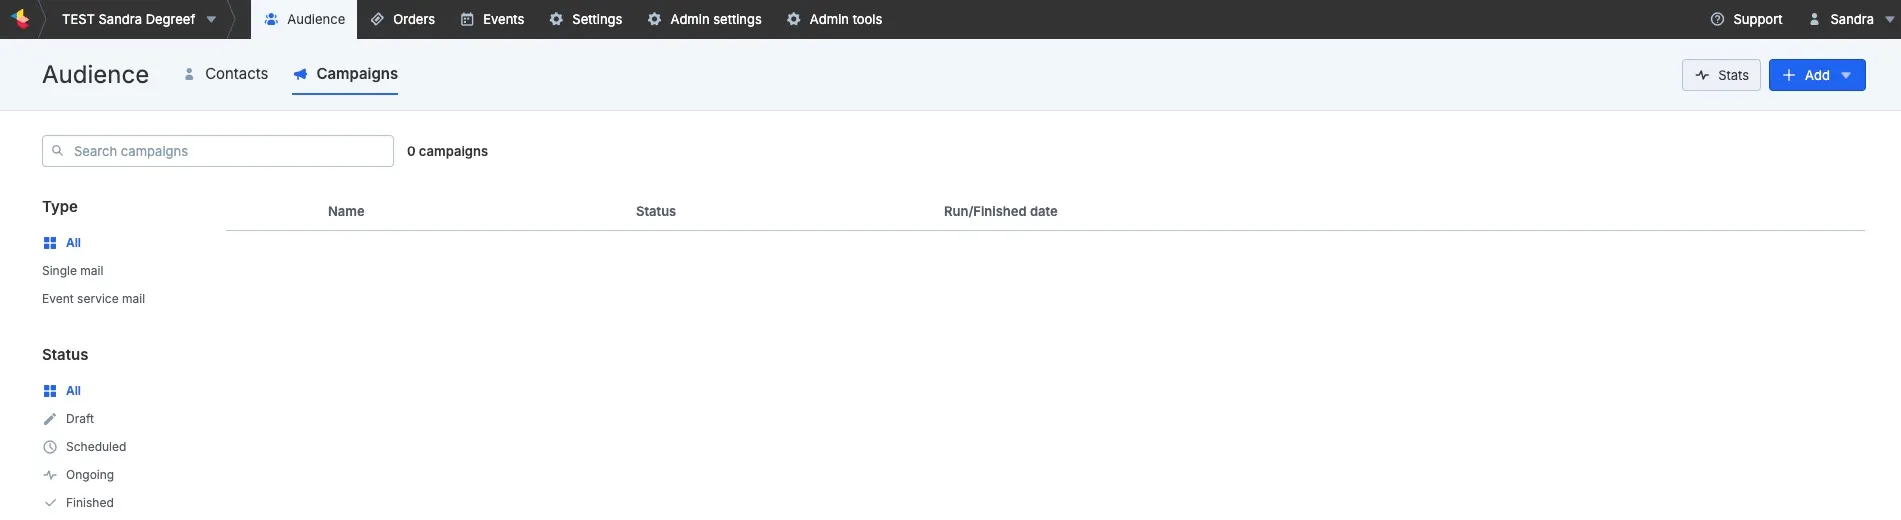
- Open the Audience module to add a new campaign.
- Click Add, then select Email campaign to create a new campaign.
- Enter the campaign name and choose the type Event service mail.
- Click Save.
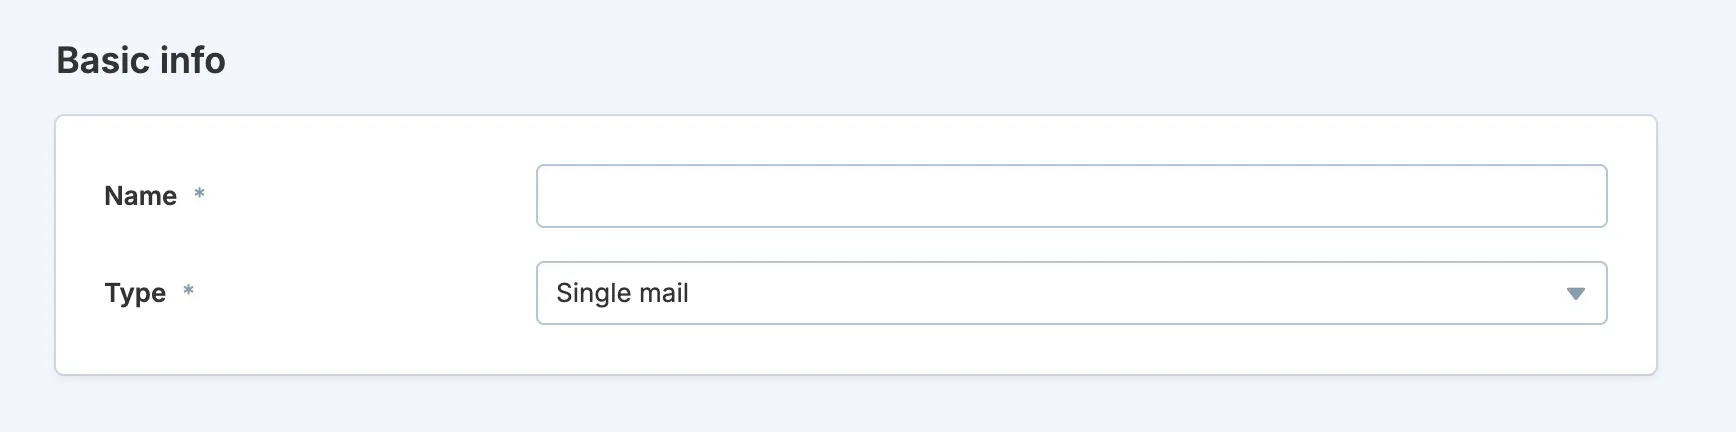
The name you enter here is not visible to the public; it is only for internal use.
Configuration
On the next screen, follow these steps:
- Select the 'From' email address from the dropdown menu. Note that you can only choose from email senders that were set up when the module was implemented.
You can set up a maximum of five sender addresses. Would you like to add an extra sender address? Please contact support.
- Choose the event for which you want to send the email. It is also possible to set up a service mail for multiple events at the same time by choosing 'Filter events'. These are the same filters used in the Events module.
- Choose when the email will be sent. This can be either before or after the event.
Additional advantages of event service mails:
- Automatic updates for changes: If the date or time of an event changes, the email's delivery schedule is automatically adjusted to reflect the new details.
- Automatic delivery for new purchases: If someone buys a ticket for the event after the event service email has been sent, the email will automatically be sent to this person as well. As the end date of the event gets closer, these emails will be dispatched more frequently:
- More than 24 hours in the future: every 3 hours
- 3 to 24 hours in the future: every hour
- Less than 3 hours in the future: every 15 minutes
These automatic adjustments ensure that you always stay up to date and that all visitors receive the correct information.
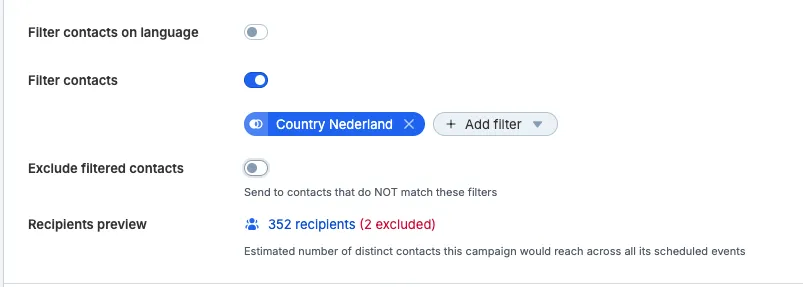
- If you work with a multi-language account, you can filter contacts by language.
- Choose which contacts should (not) receive the email. You can filter contacts and then choose whether to send the email to this selection or exclude them from receiving it.
- Add the subject line and optionally the preheader of your email in the designated fields. A preheader is a short summary text that appears in the inbox directly behind or below the subject line.
Designing the Email Content
Now you can design your email content. You have several options:
- Design yourself without a template: Choose 'Empty template' if you want to create the content yourself without saving it as a reusable template.
- Create a template for future use: Click the link 'You can create email templates here'. This will take you to Settings --> Mail templates, where you can create a reusable template.
- Use an existing template: If you want to start from an existing template, select the desired template from the dropdown menu.
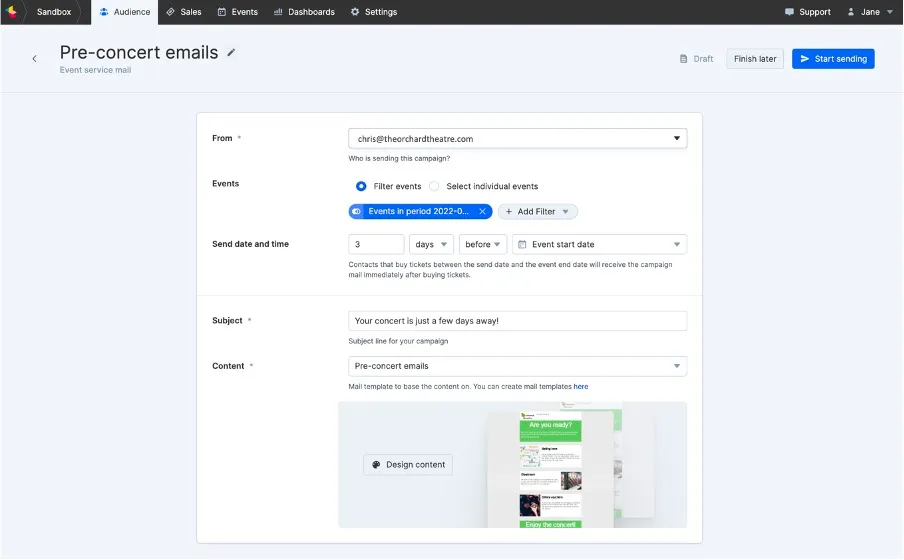
With the convenient email editor, you can now design your email. Also see Designing EmailsDesigning Emails.
Choose the desired content blocks and design the email exactly how you want. If you add your content to an existing template, it will only be added to that specific email campaign and not to the template itself.
You can also find your mail templates under Settings - Communication and design.
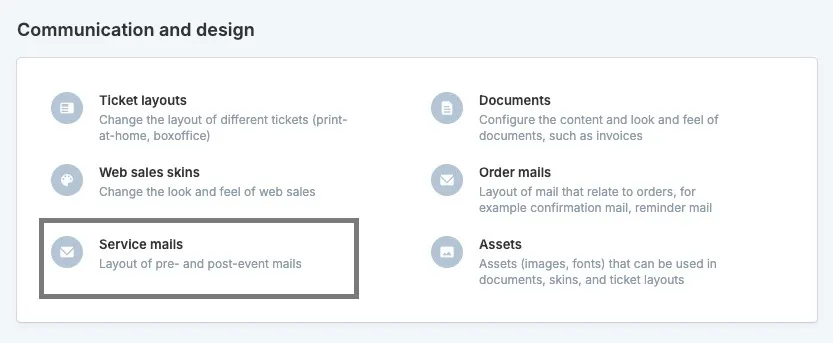
Click on Design content. This opens the visual designer, where you can create or adjust the email content.
In the visual designer, you can fully customize the content to your liking. You have various editing options, such as adding text, images, and formatting. You can also add contact and event merge tags to personalize the email.
Add download tickets link
If you are sending an email with practical information before an event, you can give attendees the option to download their tickets again via a link in the service email.
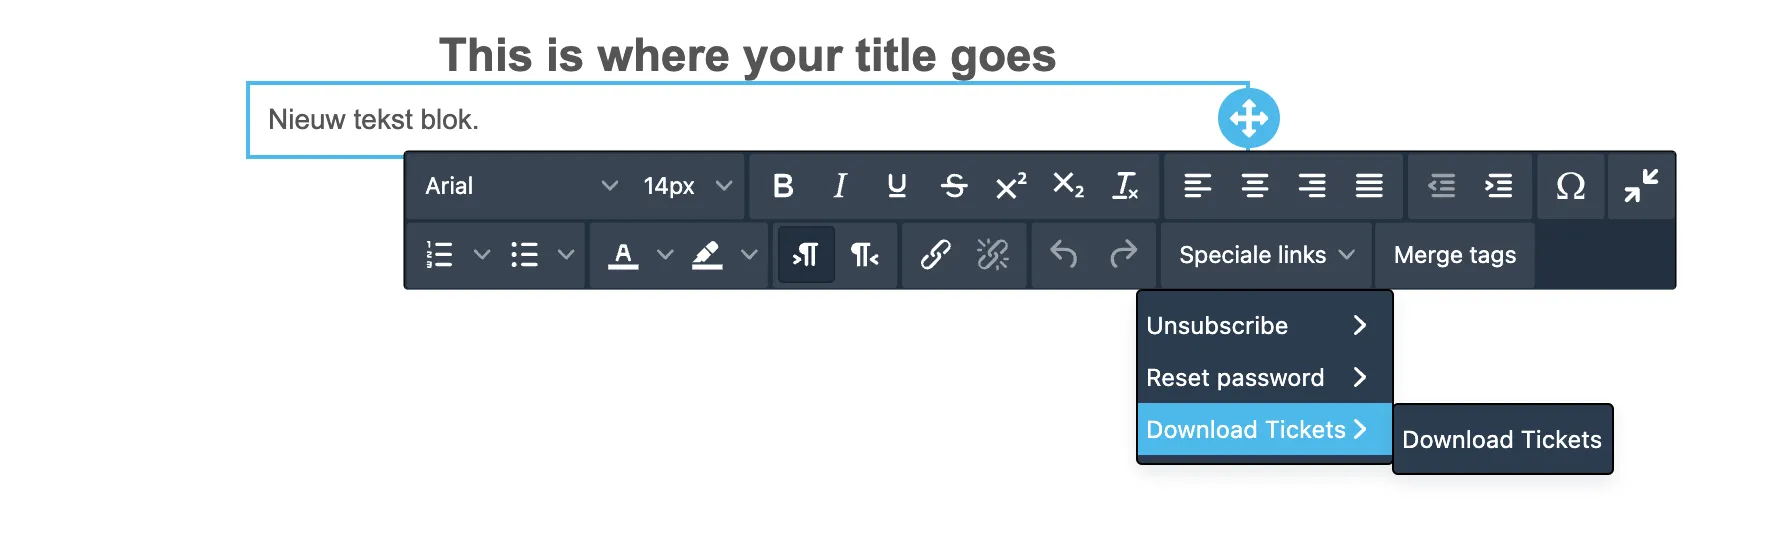
Use the special links that you can select within a text block, and choose Download Tickets. A download button will be added immediately.
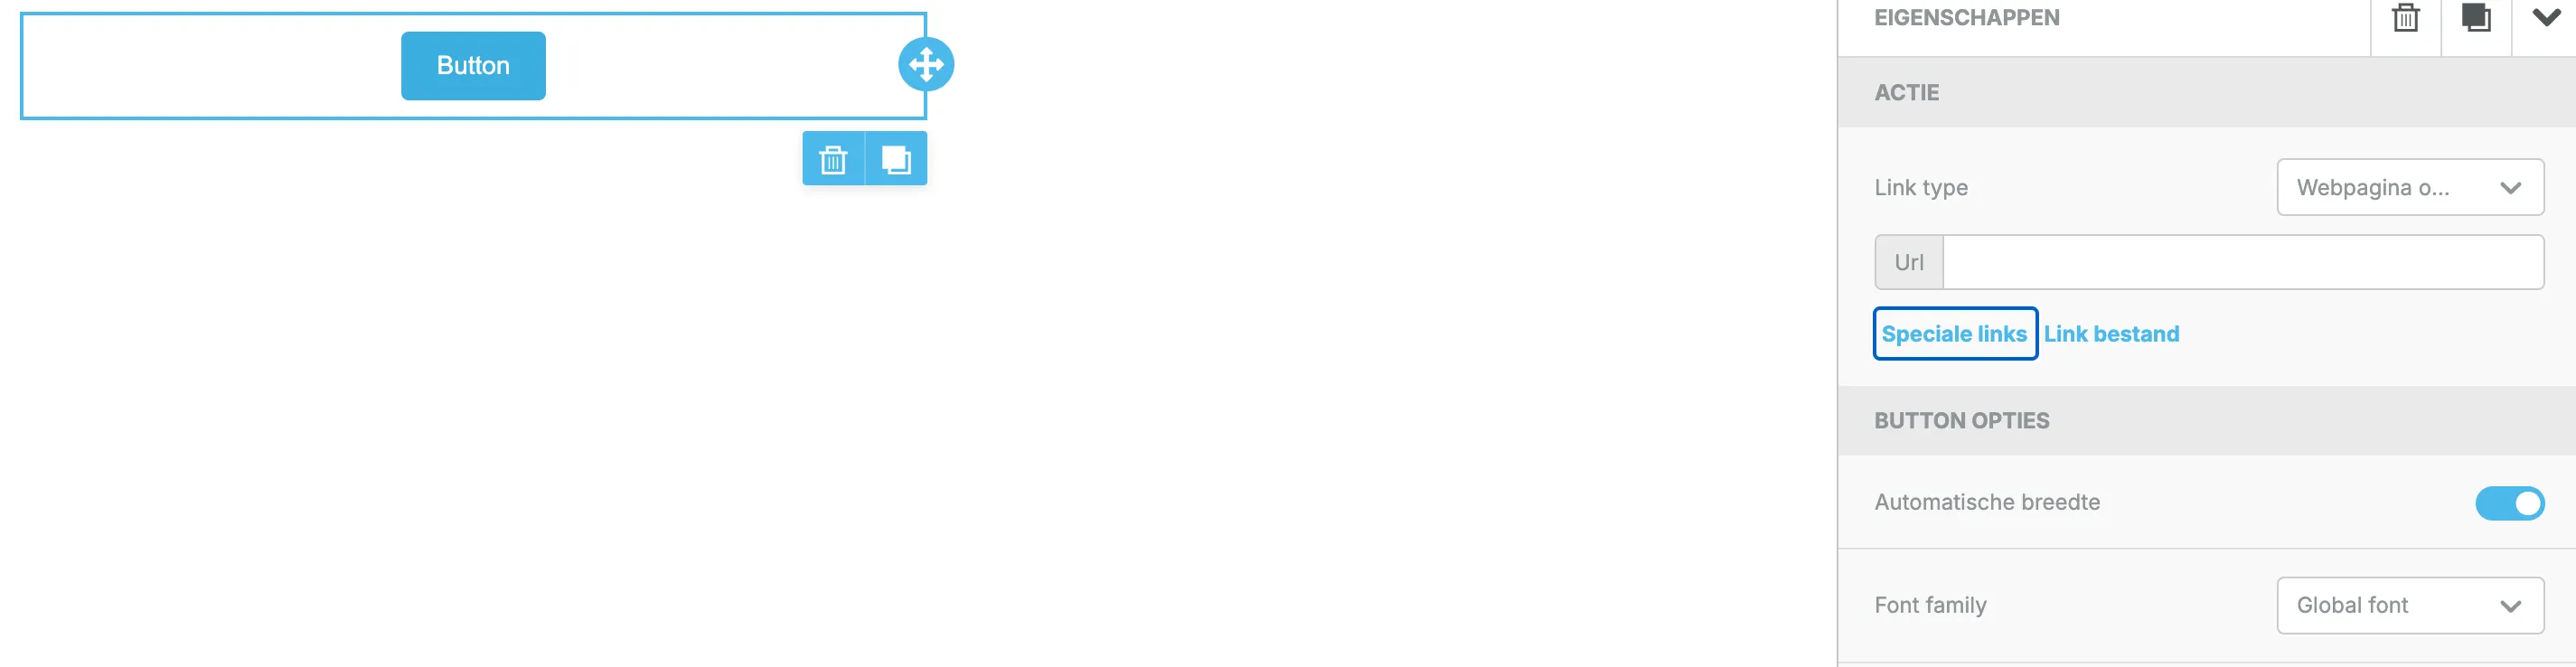
You can also add a button that allows the customer to download their tickets. Use a button combined with the special links.
Is the Ticketmatic App active for your account? Then you can add a reference to the app in your service mail.
Note that a PDF download will only be available for delivery scenarios where this setting is enabled:

Adding merge tags
When creating text blocks, you can also choose to add merge tags to personalize the email. You can add contact merge tags to include contact information from Ticketmatic in your email (such as name, first name, or salutation), or use event merge tags to display event-specific information (such as timings, location, or other practical info).
All fields available in your contacts or events in Ticketmatic can also be retrieved in the mailings.
Merge tags make it easy to prepare a generic email that you can reuse for all your event service mails.
It is not possible to include the event image from Ticketmatic directly in the mailings.
Missing certain merge tags? Please contact support.
In addition, there are two handy features available:
- View preview: You can preview the email in both desktop and mobile versions, so you can see how the email looks on different devices.
- Send test email: You have the option to send a test email to an email address of your choice to check if everything is displayed correctly. Important: in test emails, merge tags will not be populated, and the 'Download Tickets' button will not work because there are no actual tickets linked to the test email.
Once you are satisfied with the design, click Save and close to save your changes and return to the overview.
Sending
Once the send time is properly configured, you can start sending your email.
As soon as you click Start sending, the campaign becomes active. You can also choose to finish the email later if you are not quite ready yet.
After sending or scheduling the campaign
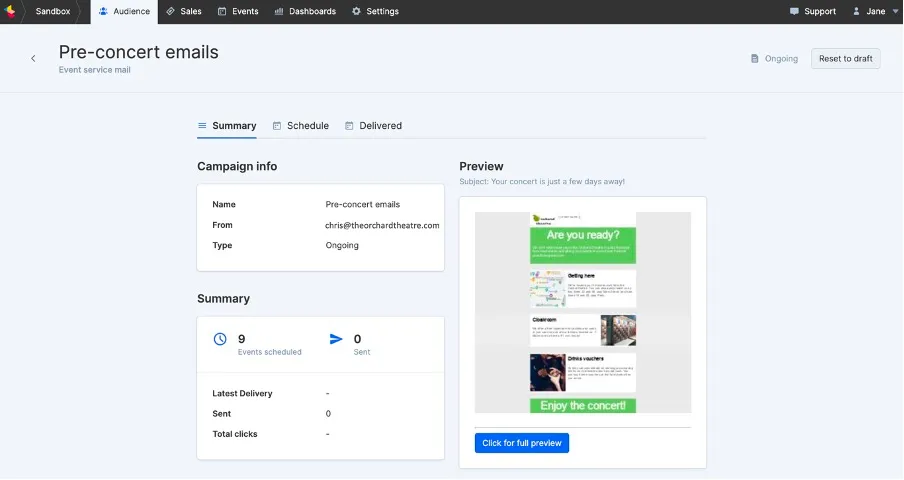
Once you have sent or scheduled the campaign, you will land on an Overview screen. In the Overview screen, you will see the following:
- Campaign info, including the name, email sender, campaign status (e.g., sent or scheduled), and the progress of the sending process.
- A small Preview of the email, with an option to click through to a full preview.
- A Summary of the number of events for which emails are scheduled, the number of events for which emails have been sent, the latest delivery, and the total number of clicks.
You can always Reset to draft if you need to make changes to emails that have not yet been sent.
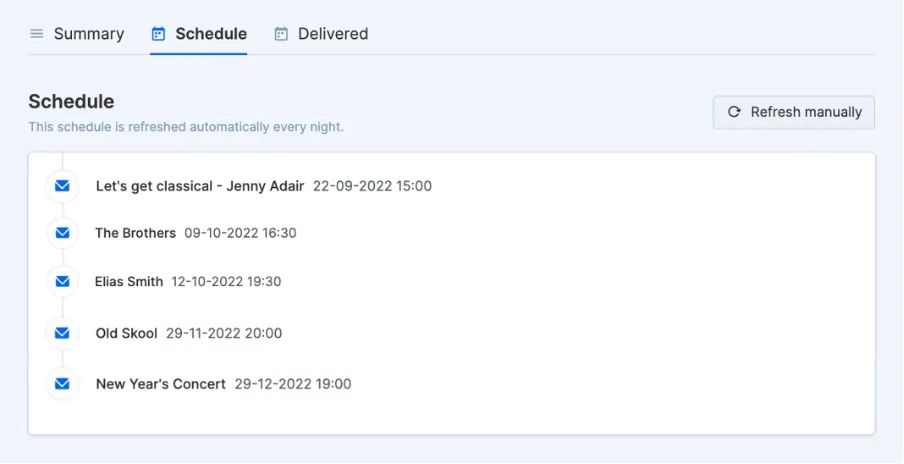
The Schedule tab shows a list of all scheduled emails. Delivered shows how many times the email was delivered and viewed.
Back on the main Campaign overview page, the status of the campaign in our example will appear as Ongoing, showing the number of sent emails and the number of scheduled events.
This will continue updating as emails are sent. Once all emails have been sent, the status will change to Finished.
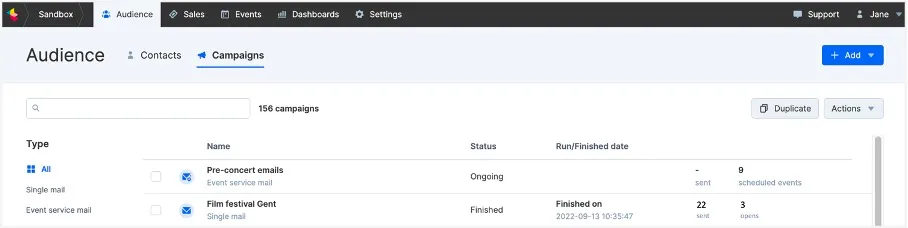
On the main page, you will find an overview of all campaigns. You can filter by mail type (single mail or event service mail) and by status (Draft, Scheduled, Running, and Completed). In the top right corner, you will find the Statistics button, which allows you to see how many emails were sent out periodically.
Rewatch our webinar on creating email campaigns here. (in Dutch)