Installing a Boca printer for use with Ticketmatic
How can I configure my new printer in Ticketmatic?
The steps below describe how to connect a new (Boca) printer to Ticketmatic. For other operating systems or printers, some steps might differ slightly, but the overall concept remains the same.
Install the printer
Install the printer according to the provided instructions.
Configure the printer for the correct paper size
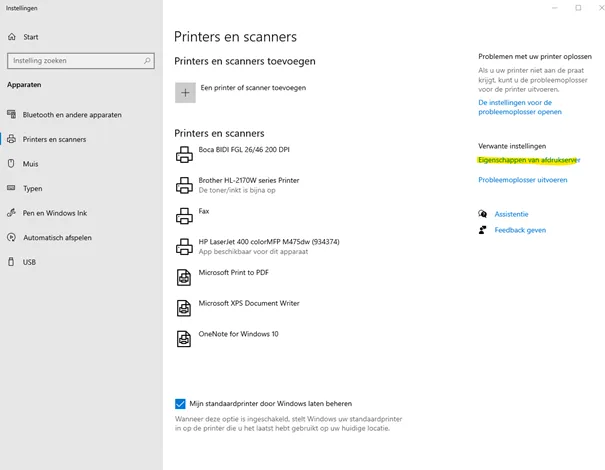
Go to the ‘Printers and scanners’ screen in your system settings.
When the Boca printer is correctly installed, it will appear in this list.
Windows 10
Windows 11
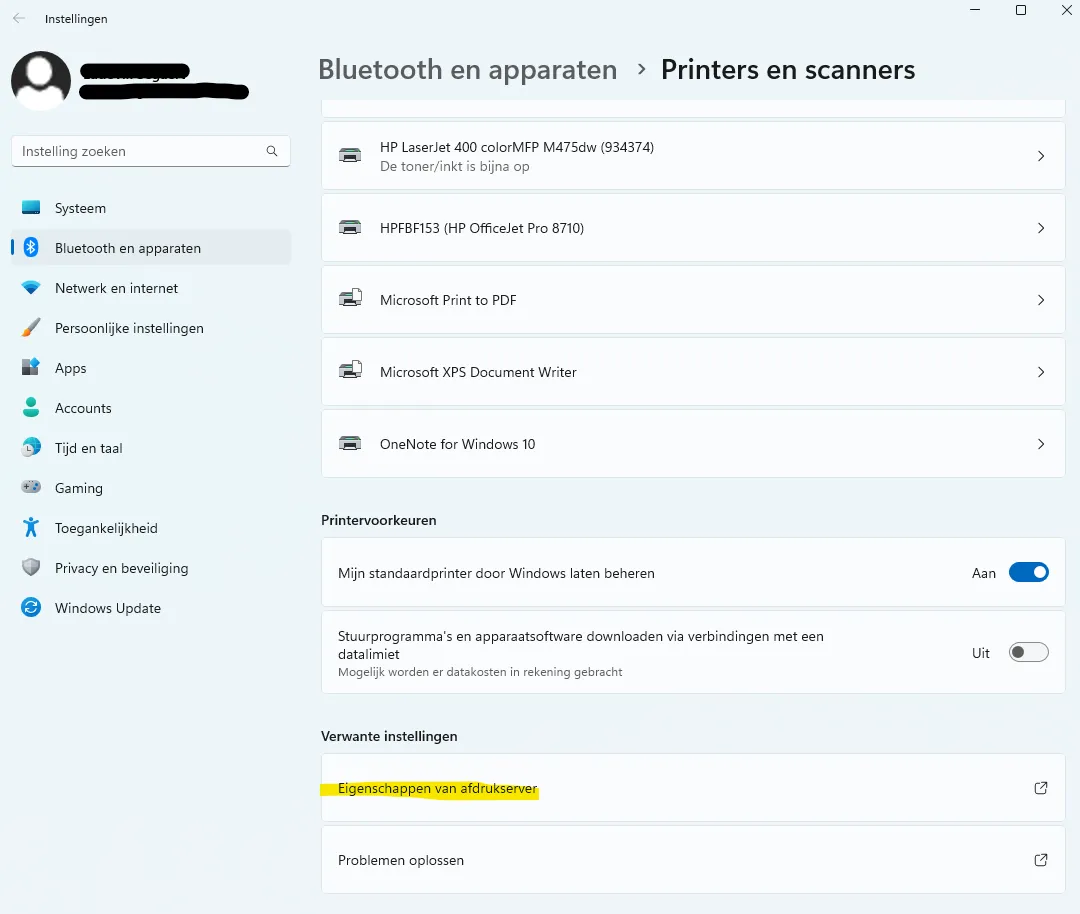
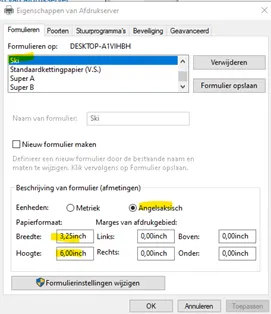
Check under Related settings – Print server properties whether there is a paper size matching your tickets (preferably entered in imperial units).
If it does not exist, add a new form.
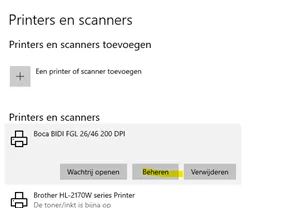
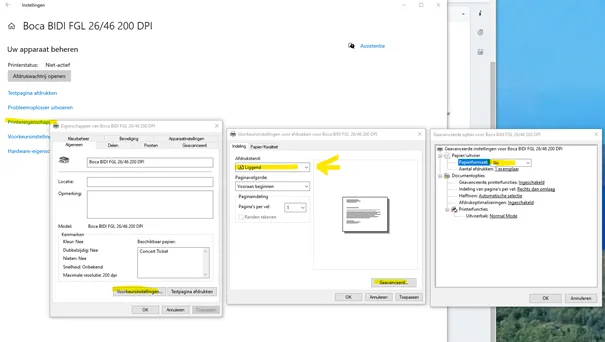
In the control panel, click your Boca printer --> Manage --> Printer properties.
Under Preferences – Orientation, choose Landscape.
Under Preferences – Advanced, select paper size Ski or the custom size you created as described above.
Install Ticketmatic Print client
Install the Ticketmatic print client: Installing the Print Client
Install browser extension
Install the browser extension
The browser extension is available for Google Chrome and Mozilla Firefox. You need to use one of these browsers to work with the print client.
Installing the print client extension on Google Chrome
Visit the Chrome Web Store to install the extension: Ticketmatic extension on Chrome Web Store
Press "Add to Chrome" to install the extension. You may need to restart your browser afterwards.
(Click here for the older version of the extension)
Installing the print client extension for Mozilla Firefox
Go to Mozilla Add-ons to install the extension.
Click the "Add to Firefox" button to install.
You may need to restart your browser afterwards.
Set printer parameters in Ticketmatic
Follow the instructions: Setting Printer Parameters